Mold: A frame in which specialized materials are poured, so that when it hardens, it takes the shape of a mold.There are many types of molds, which differ according to the material to be molded, the nature of use and the number of times of use It can also be classified into: open templates – closed templates

Open Molds
They are closed from all sides except for the upper side, which is completely open.
Closed Molds :
It is used to obtain a constant thickness of the product to be cast, and to deal with some pieces where high parts do not rest on top of the material used in the casting.
How to choose the right mold type
The type of mold is chosen based on several factors, including: Frequency of use: frequent or limited Type of materials that will be poured into the mold: cement, epoxy, polyester, and others. The size of the piece to be executed: small or large. The shape and dimensions of the piece to be executed. Details of the piece to be executed: protrusions, engravings, zigzags, etc.
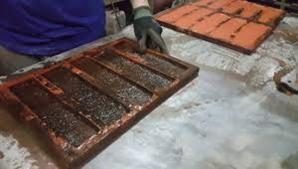
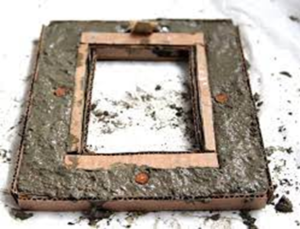
Concrete and cement products molds
Multi-use: such as metal molds, rubber molds
Molds of limited use: such as plastic molds, wooden molds or any other perishable materials.
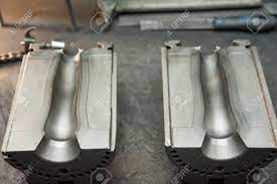
Metalic Molds
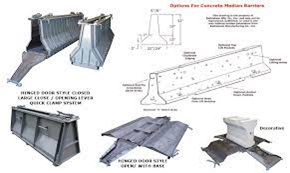
Such as the molds used in the manufacture of bricks, tiles and concrete roadblocks It is usually manufactured through the process of welding and assembling fixed or moving metal parts, and is characterized by its durability, stability of dimensions and details, and the possibility of using it for many times, thousands or several thousand times. Or through the process of melting and casting metals to take the form of a mold that is usually composed of one or two pieces at most.
Rubber Molds
There are two common types of rubber used in molds: 1- Rubber that needs a high temperature (furnaces) to harden and take the final shape, and it is usually used in industries. 2- Rubber consisting of two chemical compounds, and it hardens as a result of the interaction of the two compounds by a chemical reaction and is exothermic (ie, it does not need heat to solidify, but it produces heat during the reaction process). It is the most used in handicrafts.
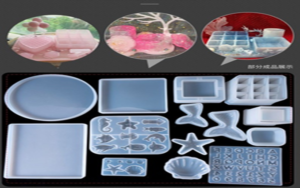
The most famous of its well-known types is silicon, and it is worth saying that there are types of silicone that differ according to the nature of use, and they are classified mainly according to the degree of hardness: from very soft to very hard, and the hardness is measured in the Shore unit. Which uses three main classifications A, D, 00 to measure the hardness and flexibility of rubber, where A is for the softest products, and a number is added to the left of the letter to indicate the amount of ductility, such as A40, A90. The higher the number, the higher the hardness of the product, that is, the less its ductility. The softer types are usually used for small-sized pieces, and for pieces that have fine and small details, and they are not suitable for large pieces and high thicknesses because they cannot maintain their size, that is, they expand and change their shape easily because they are very flexible. The hardness of the rubber is selected based on the type of application.

How to make rubber molds
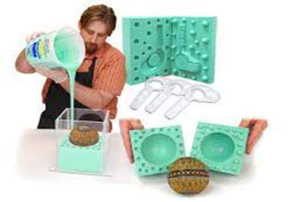
To make rubber molds, it is necessary to make a preliminary mold called the master mold. Where the rubber is poured into the main mould, it is left to harden and in turn becomes a rubber mold that can be used later to pour the pieces into it.
Preparing the main mold
The main mold consists of two parts: the model and the incubator. Model: It is the piece that the rubber mold should be used to obtain repeatedly. If the piece is available, it will be the same model, and if it is not available, it is formed using several methods such as: Hand-made of wood, clay, gypsum, or the like. Or drilling and forming using CNC drilling machines. Or by assembling different components to obtain the desired shape, etc.
Incubator: It is the outer frame that contains the model, into which rubber was poured, to obtain the final shape of the rubber mold with the required shape, dimensions and measurements. The incubator is usually made of wood, plastic panels, or the like, provided that the following are taken into account: It should be tightly closed so that liquid rubber does not pass through when pouring and before the rubber hardens. It should be solid enough to maintain the shape of the mold until it hardens. It should have a smooth inner face so that it does not stick to the liquid rubber It should be installed in a way that allows it to be easily disassembled to extract the rubber mold without causing damage. The internal distances between the sides of the model and the sides of the incubator should be equal to the thickness of the rubber mold to be made, and it should be taken into account here that the thickness is suitable for use.
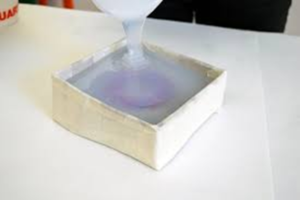
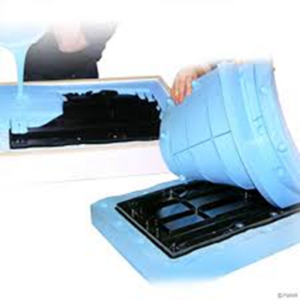
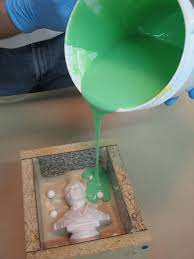
Upon completion of the work and formation of the incubator, the model is fixed inside it in the designated place using an adhesive material or using an appropriate installation method such as screws, for example. The inner faces of the incubator are isolated, as well as the surfaces of the model that will be covered with rubber with an insulating material such as wax, in order to prevent the rubber from sticking to the incubator or the model when it hardens and to facilitate the process of its removal and extraction. After completing the preparation of the incubator and installing the prototype inside it and isolating the internal surfaces, we will have obtained the basic mold.
The base mold is placed on a flat horizontal surface The rubber compound and its hardener (towel) are added and mixed according to the manufacturer’s instructions, and a color dye can be added to the mixture if the rubber mold is desired to be colored. The liquid rubber is poured into the incubator and over the prototype slowly, so that the occurrence of bubbles is minimized. During and after the molding process, it is preferable to shake the main mold using a vibrator, or manually by shaking and hammering on the mold to allow bubbles to come out to the surface and be disposed of. The rubber is left for the appropriate period of hardening, then it is loosened and removed from the main mould. In the event that there are rubber growths that can be removed using a scalpel, then the rubber mold is ready for use.
Epoxy And Crafts Molds
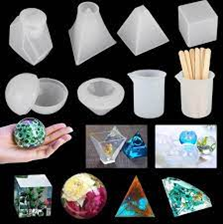
Rubber molds can be used effectively to make products from epoxy or cement, and rubber molds are used as mentioned previously if it is desired to produce a large number of the same piece In the event that it is desired to make a piece of epoxy or cement once or a few times, the main / main mold is used for this and in the way that was previously explained, bearing in mind that some materials are more perishable than other materials, and here we talk about the materials used in the manufacture of the main mold .
fiberglass molds

One of the most common types of templates, it is commonly used by professionals. Fiberglass molds are used in casting and forming many materials such as cement, epoxy, polyester and others. Fiberglass molds are often used in the production of parts with flat surfaces and few details, but the most common use of them is only as an incubator, and there is another mold inside, which is usually of rubber. In this model, the flexible properties of rubber are taken advantage of to make shapes with fine details and zigzag surfaces, and the incubator made of fiberglass is used to maintain the general shape of the piece as the rubber mold will expand or expand under the influence of the weight of cement or polyester, for example, and here comes The role of the incubator to prevent the expansion or expansion of the rubber mold.